
Hoy probamos por un rato el Arduino MKR1000 (GENUINO MKR1000 que es lo mismo)
Se trata de uno de los productos más recientes de la familia ARDUINO, un microcontrolador que incorpora conectividad WiFi y encripción por hardware, lo cual le permite conectarse al Internet usando protocolo HTTPS; que – en mi opinión – lo ubica por encima del afamado Sparkfun Thing ESP8266.
Pueden ver las especificaciones de este dispositivo acá: https://www.arduino.cc/en/Main/ArduinoMKR1000
Dentro de las funciones más destacadas podemos mencionar:
- Microcontrolador de bajo consumo eléctrico de 32 bits.
- Puerto de alimentación USB de 5V
- Conector para batería LIPO de 3.7V, 700mAh
- Voltaje de operación de 3.3V (! Importante… por que el voltaje aplicado a los puertos de GPIO no debe superar los 3.3V)
- 8 (ocho) puertos de I/O Digitales de propósito general, que incluyen 4 (cuatro) pines PWM
- 1 Puerto serial UART
- 1 Puerto SPI
- 1 Puerto I2C
- 7 Entradas analógicas de 8/10/12 bits
- 1 Salida Analógica (DAC de 10 bits)
- 8 Puertos con capacidad de interrupción externa (0,1,4,5,6,7,8,A1,A2)
- Capacidad de entregar 7mA de corriente en cada I/O Pin
- Memoria no-volatil (FLASH) de 256KB
- Memoria Volatil (SRAM) de 32KB
- RTC de 32.768 KHz
- 48MHz de Procesamiento
- Puerto USB como cliente y embedded host
- Comunicación WiFi
- Chip de Encripción que permite la comunicación por protocolo SSL
- Precio al momento de escribir este artículo: ~$35 (aca)
- Utiliza la libreria Wifi101 disponible en la ultima version del ARDUINO IDE.
Contenido
Lo primero que probamos – SSL
Por supuesto, la capacidad de conectarse a un servidor via HTTPS/SSL. Para esto utilizamos el tutorial titulado «Scheduled WiFi SSL Web Client«; solo que le realizamos algunas modificaciones para entender mejor el código… pueden encontrarse aca: enlace o ver listado 1 abajo.
Lo segundo que probamos – Access Point
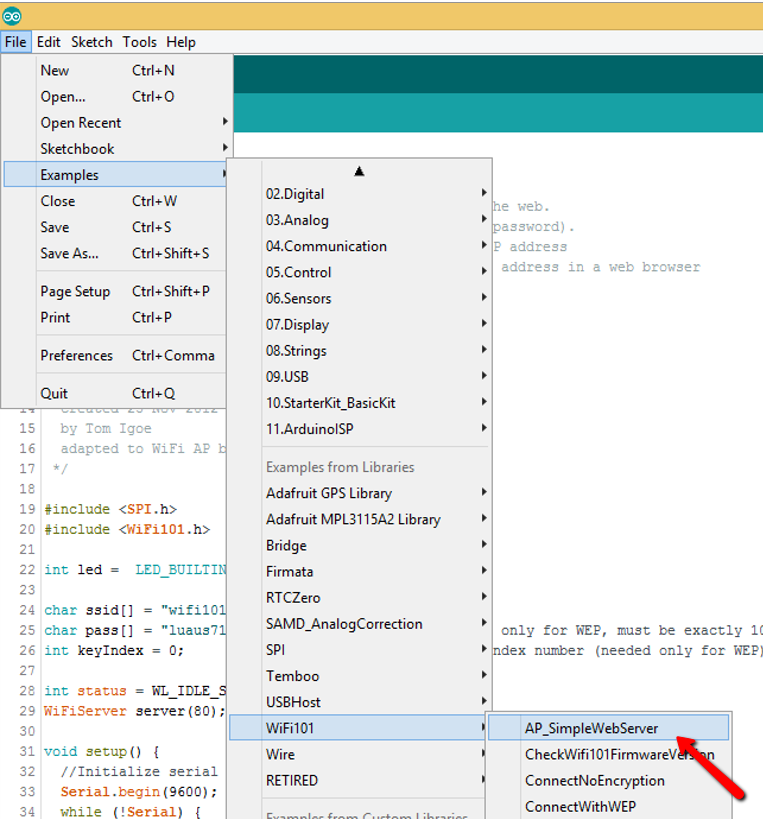
Como ya dijimos, es compatible con la librería WiFi101; así que decidimos probar el ejemplo llamado «AP_SimpleWebSever» el cual implementa un Access Point, y un servidor web que escucha en la dirección IP 192.168.1.1 y sirve un par de enlaces que automáticamente encienden y apagan un LED. Ver Listado 2 abajo.
Listado 1 – SSL + MKR1000 + PVCLOUD TEST
/*
  Scheduled WiFi SSL Web Client for MKR1000

  This sketch connects to the Arduino website every minute and downloads the ASCII logo to display it on the serial monitor

  created 19 Jan 2016
  by Arturo Guadalupi <a.guadalupi@arduino.cc>

  http://arduino.cc/en/Tutorial/

  This code is in the public domain.

  Modified by Jose Nunez <jose.nunez@intel.com>

*/

#include
#include
#include

char ssid[] = "opodiym";      //  your network SSID (name)
char pass[] = "luaus7151";       // your network password

int keyIndex = 0;                  // your network key Index number (needed only for WEP)

int status = WL_IDLE_STATUS;

// Initialize the Wifi client library
WiFiSSLClient client;

// server address:
char server[] = "costaricamakers.com";

bool sendRequest = true; // used to understand if the http request must be sent

/* Create an rtc object */
RTCZero rtc;

/* Change these values to set the current initial time */
const byte seconds = 50;
const byte minutes = 00;
const byte hours = 17;

/* Change these values to set the current initial date */
const byte day = 24;
const byte month = 05;
const byte year = 16;

void setup() {
  delay(3000);
  Serial.begin(115200);
  serialOut("Begin...");

  serialOut("Connecting to Access Point...");
  connectToAP();    // connect the board to the access point

  serialOut("Printing WIFI Status...");
  printWifiStatus();

  serialOut("Making initial HTTP Request...");
  httpRequest();

  serialOut("Calling listenToClient()...");
  listenToClient();

  serialOut("Setting RTC Up...");
  rtc.begin();
  rtc.setTime(hours, minutes, seconds);
  rtc.setDate(day, month, year);

  rtc.setAlarmTime(0, 0, 0);    //in this way the request is sent every minute at 0 seconds
  rtc.enableAlarm(rtc.MATCH_SS);

  rtc.attachInterrupt(alarmMatch);

  serialOut("SETUP COMPLETE");
}
void loop() {

  if (sendRequest) {
    serialOut("sendRequest was TRUE");
    sendRequest = false;

    serialOut("Calling httpRequest()...");
    httpRequest();

    serialOut("Calling listenToClient()...");
    listenToClient();
  }
}

void printWifiStatus() {
  // print the SSID of the network you're attached to:
  Serial.print("SSID: ");
  Serial.println(WiFi.SSID());

  // print your WiFi shield's IP address:
  IPAddress ip = WiFi.localIP();
  Serial.print("IP Address: ");
  Serial.println(ip);

  // print the received signal strength:
  long rssi = WiFi.RSSI();
  Serial.print("signal strength (RSSI):");
  Serial.print(rssi);
  Serial.println(" dBm");
}

void alarmMatch() {
  sendRequest = true;
}

void connectToAP() {
  // check for the presence of the shield:
  if (WiFi.status() == WL_NO_SHIELD) {
    Serial.println("WiFi shield not present");
    // don't continue:
    while (true);
  }

  // attempt to connect to Wifi network:
  while ( status != WL_CONNECTED) {
    Serial.print("Attempting to connect to SSID: ");
    Serial.println(ssid);
    // Connect to WPA/WPA2 network. Change this line if using open or WEP network:
    status = WiFi.begin(ssid, pass);

    // wait 1 second for connection:
    delay(1000);
  }
}

// this method makes a HTTP connection to the server:
void httpRequest() {
  sendRequest = false;

  // Print request time
  Serial.println();
  Serial.print("Request sent @ ");
  print2digits(rtc.getHours());
  Serial.print(":");
  print2digits(rtc.getMinutes());
  Serial.print(":");
  print2digits(rtc.getSeconds());
  Serial.println();
  Serial.println();

  if (client.connect(server, 443)) {
    // Make a HTTP request:
    client.println("GET /pvcloud_test/mkr1000test.json HTTP/1.1");
    client.println("Host: costaricamakers.com");
    client.println("User-Agent: MKR1000/1.1");
    client.println("Connection: close");
    client.println();
  }
  else {
    Serial.println("connection failed");
  }
}

void listenToClient()
{
  unsigned long startTime = millis();
  bool received = false;

  while ((millis() - startTime < 5000) && !received) { //try to listen for 5 seconds
    while (client.available()) {
      received = true;
      char c = client.read();
      Serial.write(c);
    }
  }
  client.stop();
  Serial.println();
  serialOut("listenToClient() FINISHED");
}

void print2digits(int number) {
  if (number < 10) {
    Serial.print("0");
  }
  Serial.print(number);
}

void serialOut(String message){
  Serial.println("-------------------------------------------------------------------------------");
  Serial.print(millis());
  Serial.print(": ");
  Serial.println(message);
}
Listado 2 – AP_SimpleWebServer
/*
  WiFi Web Server LED Blink

  A simple web server that lets you blink an LED via the web.
  This sketch will create a new access point (with no password).
  It will then launch a new server and print out the IP address
  to the Serial monitor. From there, you can open that address in a web browser
  to turn on and off the LED on pin 13.

  If the IP address of your shield is yourAddress:
    http://yourAddress/H turns the LED on
    http://yourAddress/L turns it off

  created 25 Nov 2012
  by Tom Igoe
  adapted to WiFi AP by Adafruit
 */

#include <SPI.h>
#include <WiFi101.h>

int led =  LED_BUILTIN;

char ssid[] = "wifi101-network"; // created AP name
char pass[] = "luaus7151";      // AP password (needed only for WEP, must be exactly 10 or 26 characters in length)
int keyIndex = 0;                // your network key Index number (needed only for WEP)

int status = WL_IDLE_STATUS;
WiFiServer server(80);

void setup() {
  //Initialize serial and wait for port to open:
  Serial.begin(9600);
  while (!Serial) {
    ; // wait for serial port to connect. Needed for native USB port only
  }

  Serial.println("Access Point Web Server");

  pinMode(led, OUTPUT);      // set the LED pin mode

  // check for the presence of the shield:
  if (WiFi.status() == WL_NO_SHIELD) {
    Serial.println("WiFi shield not present");
    // don't continue
    while (true);
  }

  // print the network name (SSID);
  Serial.print("Creating access point named: ");
  Serial.println(ssid);

  // Create open network. Change this line if you want to create an WEP network:
  if (WiFi.beginAP(ssid) != WL_CONNECTED) {
    Serial.println("Creating access point failed");
    // don't continue
    while (true);
  }

  // wait 10 seconds for connection:
  delay(10000);

  // start the web server on port 80
  server.begin();

  // you're connected now, so print out the status
  printWifiStatus();
}


void loop() {
  WiFiClient client = server.available();   // listen for incoming clients

  if (client) {                             // if you get a client,
    Serial.println("new client");           // print a message out the serial port
    String currentLine = "";                // make a String to hold incoming data from the client
    while (client.connected()) {            // loop while the client's connected
      if (client.available()) {             // if there's bytes to read from the client,
        char c = client.read();             // read a byte, then
        Serial.write(c);                    // print it out the serial monitor
        if (c == '\n') {                    // if the byte is a newline character

          // if the current line is blank, you got two newline characters in a row.
          // that's the end of the client HTTP request, so send a response:
          if (currentLine.length() == 0) {
            // HTTP headers always start with a response code (e.g. HTTP/1.1 200 OK)
            // and a content-type so the client knows what's coming, then a blank line:
            client.println("HTTP/1.1 200 OK");
            client.println("Content-type:text/html");
            client.println();

            // the content of the HTTP response follows the header:
            client.print("Click here turn the LED on
");
            client.print("Click here turn the LED off
");

            // The HTTP response ends with another blank line:
            client.println();
            // break out of the while loop:
            break;
          }
          else {      // if you got a newline, then clear currentLine:
            currentLine = "";
          }
        }
        else if (c != '\r') {    // if you got anything else but a carriage return character,
          currentLine += c;      // add it to the end of the currentLine
        }

        // Check to see if the client request was "GET /H" or "GET /L":
        if (currentLine.endsWith("GET /H")) {
          digitalWrite(led, HIGH);               // GET /H turns the LED on
        }
        if (currentLine.endsWith("GET /L")) {
          digitalWrite(led, LOW);                // GET /L turns the LED off
        }
      }
    }
    // close the connection:
    client.stop();
    Serial.println("client disconnected");
  }
}

void printWifiStatus() {
  // print the SSID of the network you're attached to:
  Serial.print("SSID: ");
  Serial.println(WiFi.SSID());

  // print your WiFi shield's IP address:
  IPAddress ip = WiFi.localIP();
  Serial.print("IP Address: ");
  Serial.println(ip);

  // print the received signal strength:
  long rssi = WiFi.RSSI();
  Serial.print("signal strength (RSSI):");
  Serial.print(rssi);
  Serial.println(" dBm");
  // print where to go in a browser:
  Serial.print("To see this page in action, open a browser to http://");
  Serial.println(ip);
} ![]()
Comentarios